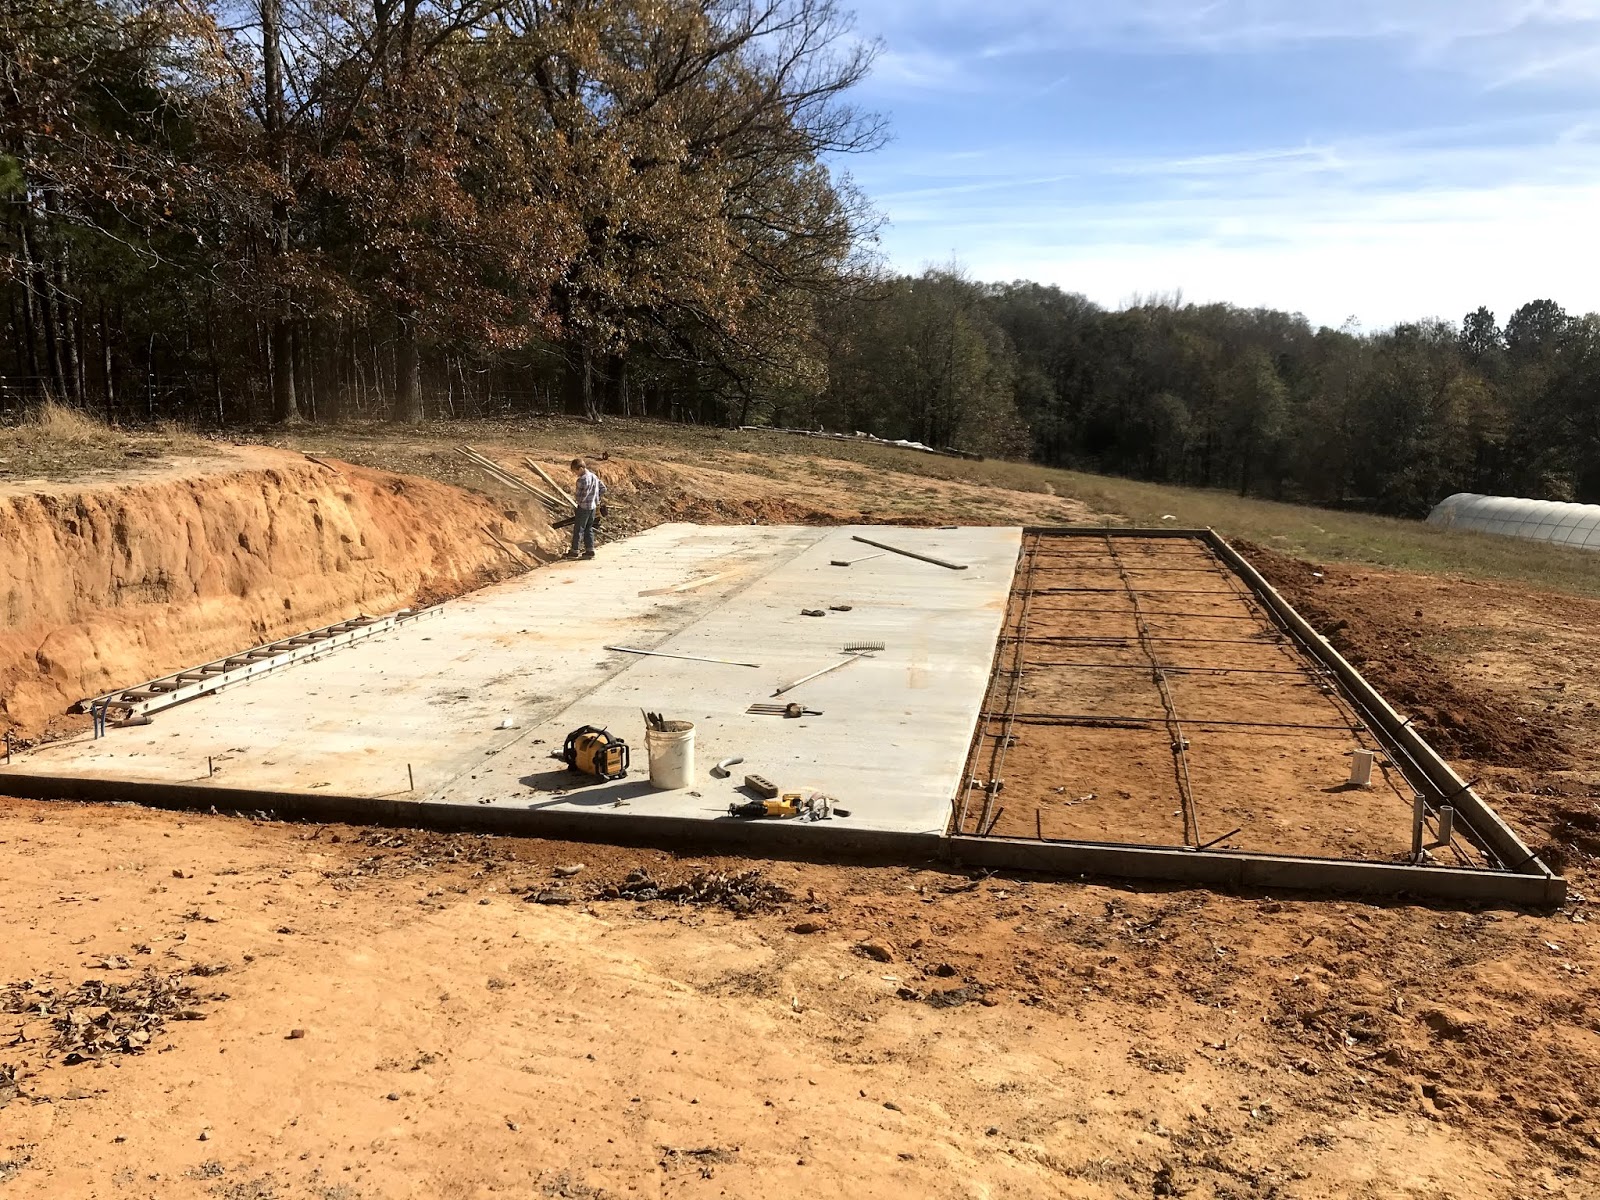
Foundation, started in November of 2017. The barn footprint will be 30' x 50', not including the 12' shed that runs down the right side. Pouring the foundation in three 10 ft wide pours, so that I could handle the pouring and finishing by myself, with a little help on the other side of the scree board.
This first section included water piping for future radiant floor heating to keep my birthing mothers toasty.

Lots of rebar, with vertical pieces to tie into the block walls.

The middle section required some plumbing for the floor drain, and strategically placed steel plates anchored to the rebar network for future anchoring of vertical support beams.

Final section, with plumbing in the front right corner for sinks.
Caspian helped with the final pour, and our handprints are near the front door.

For the blocking of the walls, I called in my friend Jerry. He is my favorite mason / baptist preacher, who can lay blocks as fast as I can bring them to him.


We had a pleasant two days, me running to stay ahead of his mortar and block needs, and chatting about various theological points.

This is when Jerry left, the last help I had until Alexe and some friends helped lean the roof trusses into position.

I ended up laying a couple more courses of blocks on the back left hand corner, and then poured the walls solid with concrete, with lots of rebar.

I took my small sawmill out to the pile of logs that had been curing since I cut them down during the big pond project a couple years earlier, and started milling.
And after cutting three logs into beams, realized if I started at this point in the process I would never get to build the actual barn.

As I was looking around for other options, my father took ill, and there was a 6 month interlude.
At some point in the spring I did upgrade my welder in preparation for getting back to the barn project, where there was going to be no electricity and a generator would be very helpful during construction. A gas powered welder/generator would be perfect, and I traded a friend my electric mig (along with some $$) for his.
Which I then practiced with, making brackets to bolt timbers together. A little chopping, drilling, and welding.

At some point in the summer I connected with a sawmill in Randolph, MS near the Amish community, and ordered everything I would need to build the skeleton of the barn.
July 17th, the first load of timber picked up at the sawmill. After barely making it home with this load, the kind owner of the local lumber yard took his giant lumber truck to the mill for me to pick up the rest. With that big truck it still took him 3 trips to bring the rest of the structural members to me.

Verticals sitting on top of the block walls are 8"x 8" oak. Full height verticals are 10" x 10". Even the small pieces were barely moveable by hand. Everything was a juggling act with the forks on the tractor.

Squaring off the ends of each timber with a chainsaw with a new blade, ends sealed with paint to minimize cracking, and hoisted into position. These shorter pieces I was able to set on the walls with the tractor, and stand up by hand.
Sill boards are 2" cypress.

Steel roof trusses, built by a small family steel company in Northern Alabama and delivered. There was no supplier in the state of Mississippi who was willing to build these in the shape (gambrel) that I wanted.

Working around the perimeter...


The rest of the lumber arrives. Days are spent re-stacking everything with spacers to let this green lumber air out and avoid mildewing. Luckily Larry's truck had a built-in fork lift for unloading.


The tent is for sun protection: We're looking at July/August in Mississippi, ambient temperature in the high 90s, humidity about the same.

Horizontal beams. 6" x 12" oak, roughly 10' long. The tractor could barely lift these, and the lifting height of the bucket was not sufficient to get the beams to above the vertical supports. Some shims on the forks to push the beams to the tip of the forks gave me about 3 inches of clearance. Lift into near-position with the tractor, then hoist off the forks onto the verticals by hand.

Not the safest worksite for visitors. The family would converge in the evening to ask why it was going so slowly.

Sticker-ed lumber, plugging away on the skeleton. The full height verticals, (10" x 10"x 10' oak) were entirely up to the tractor. With a sling on the forks I could get them vertical and roughly in position. Sledge hammer used to bump them into their final positions, (with the tractor sling acting as a back-up in case they tipped over, which happened...) Once in position, a steel plate was welded to the steel imbedded in the concrete foundation, and bolted to the post.

The skeleton was "wobbly" as it was being constructed, and would only firm up as everything tied together and diagonal braces could be installed. Setting the horizontal beams could take a couple attempts, with a vertical being knocked over, or the horizontal beams taking a roll backwards on the forks. To make these tiny adjustments using a tractor takes some practice, even more so when the tractor revs have to be redlined to be able to lift the beams in the first place.

The last of the oak horizontal beams in place. For the last 20 ft span we needed steel.

Same technique used to get these into position, with an added safety precaution of a scaffolding cage in case the beams (6" x 12" x 20') deciding to roll off the tractor forks. Yes, the cage earned its keep.

Steel beam set into position, brackets welded and bolted to the verticals.

Next layer of horizontals connecting the four sections together. These horizontals are 4" x 10" pine at 10' intervals, where the roof trusses will sit. Floor joists (2"x10") run 16" on center between these larger timbers.

The green pine was almost as heavy as the oak.

The working height at this point (12') is beyond what the tractor can reach, so much hoisting is being done by hand.


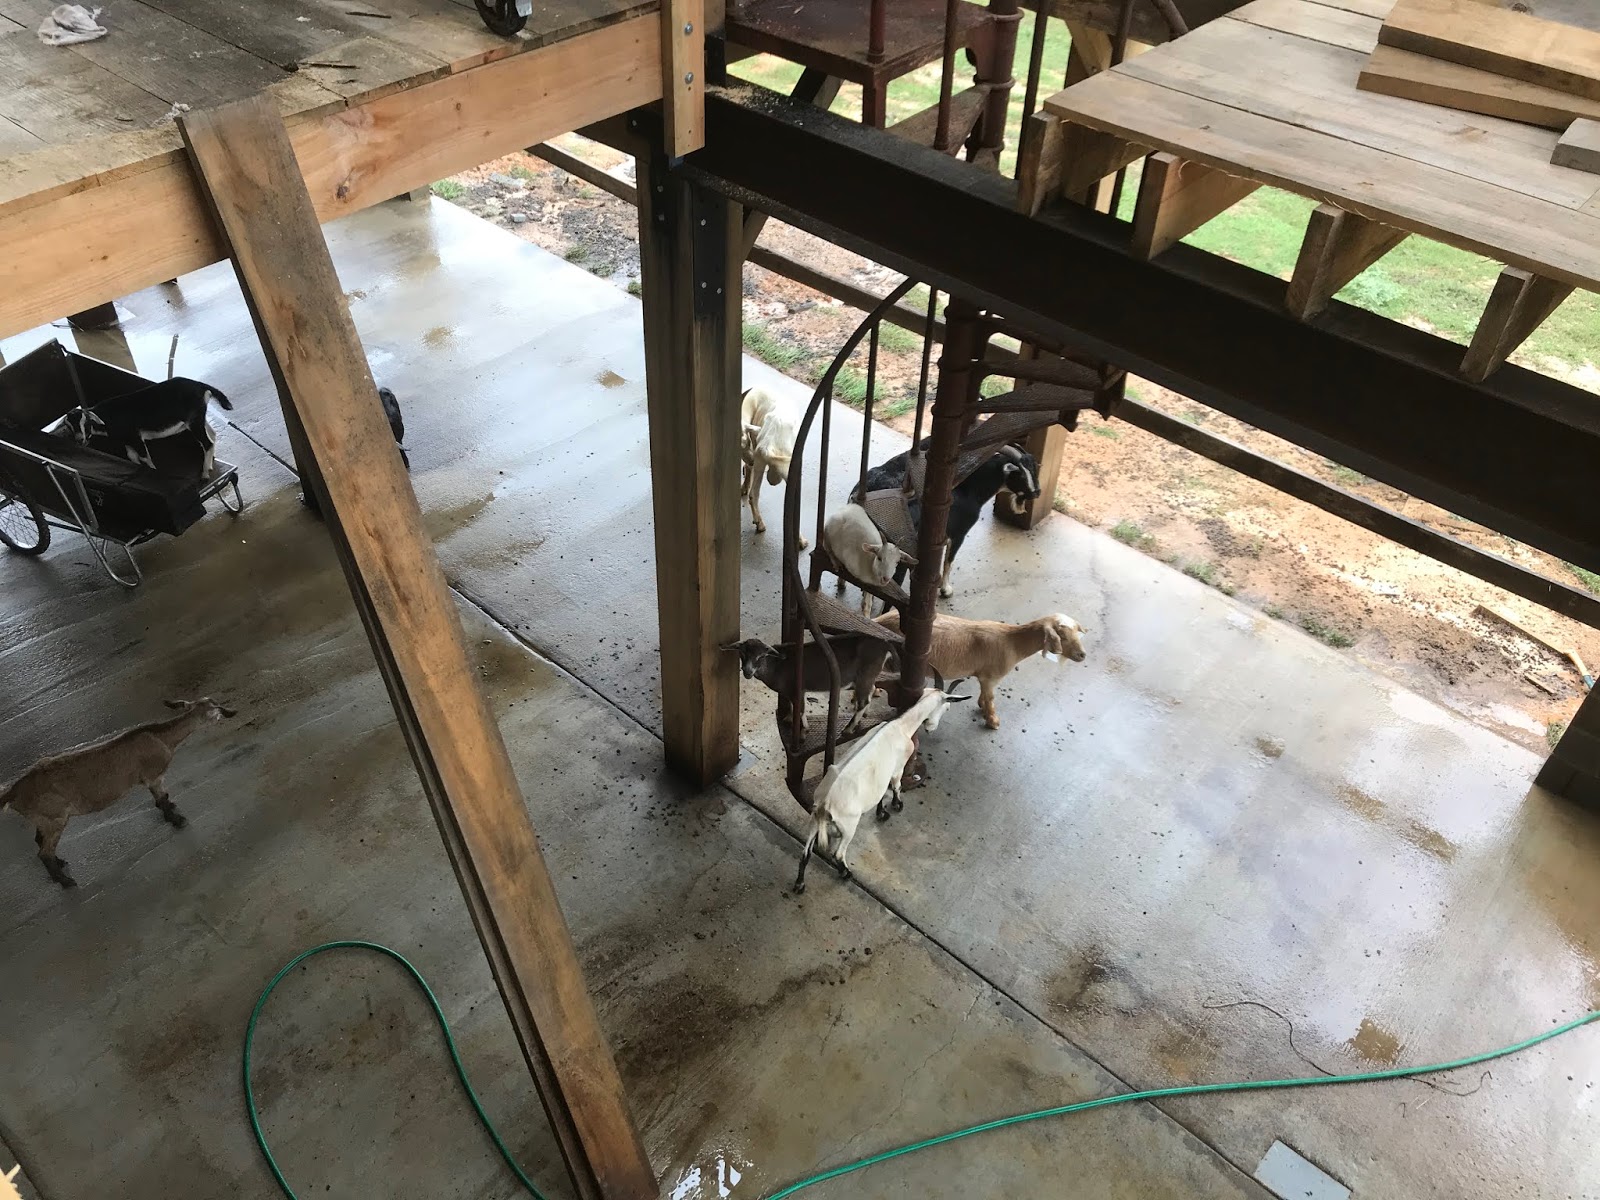
The beautiful spiral stairs, salvaged from a warehouse in Memphis, and sitting by the side of the driveway waiting for a home for two years. Alexe has accused me of building this barn just so I would have a home for these stairs.
Heavy. Like everything else. And the tractor just isn't strong or tall enough. I managed to snap four of the steps off in the process of getting them vertical.
With my rookie welding skills I hunkered down to weld the four cast iron steps back together. The first one popped as it cooled, so I ground it down and tried again. That weld took, as did the next three, and I moved on. Later that evening I did a little research to see why the first weld had popped apart, and found cast iron is usually a very difficult thing to weld, requiring pre-heating and a slow cool down period. Luckily I was working at the heat of the day, in temps over 100, in full sun. Apparently the perfect environment.

I love them.


My favorites all together!

Officially on to the second floor. Except if you notice on the left edge of the barn, there is a slight dip in the horizontal line. One of the horizontal oak timbers was cut a little narrow at one end, about half an inch. I thought it would be absorbed by the rest of the rough-sawn lumber, but I could still see it at this point, which meant I would always be able to see it. A couple hydraulic jacks, shims, and we were good to go.

1" thick pine decking. Screwed down with ceramic screws. There is not a single nail in this barn. Based on past experience with wood and Mississippi humidity, I was not going to have my barn slowly working itself apart through the seasonal swelling and shrinking.
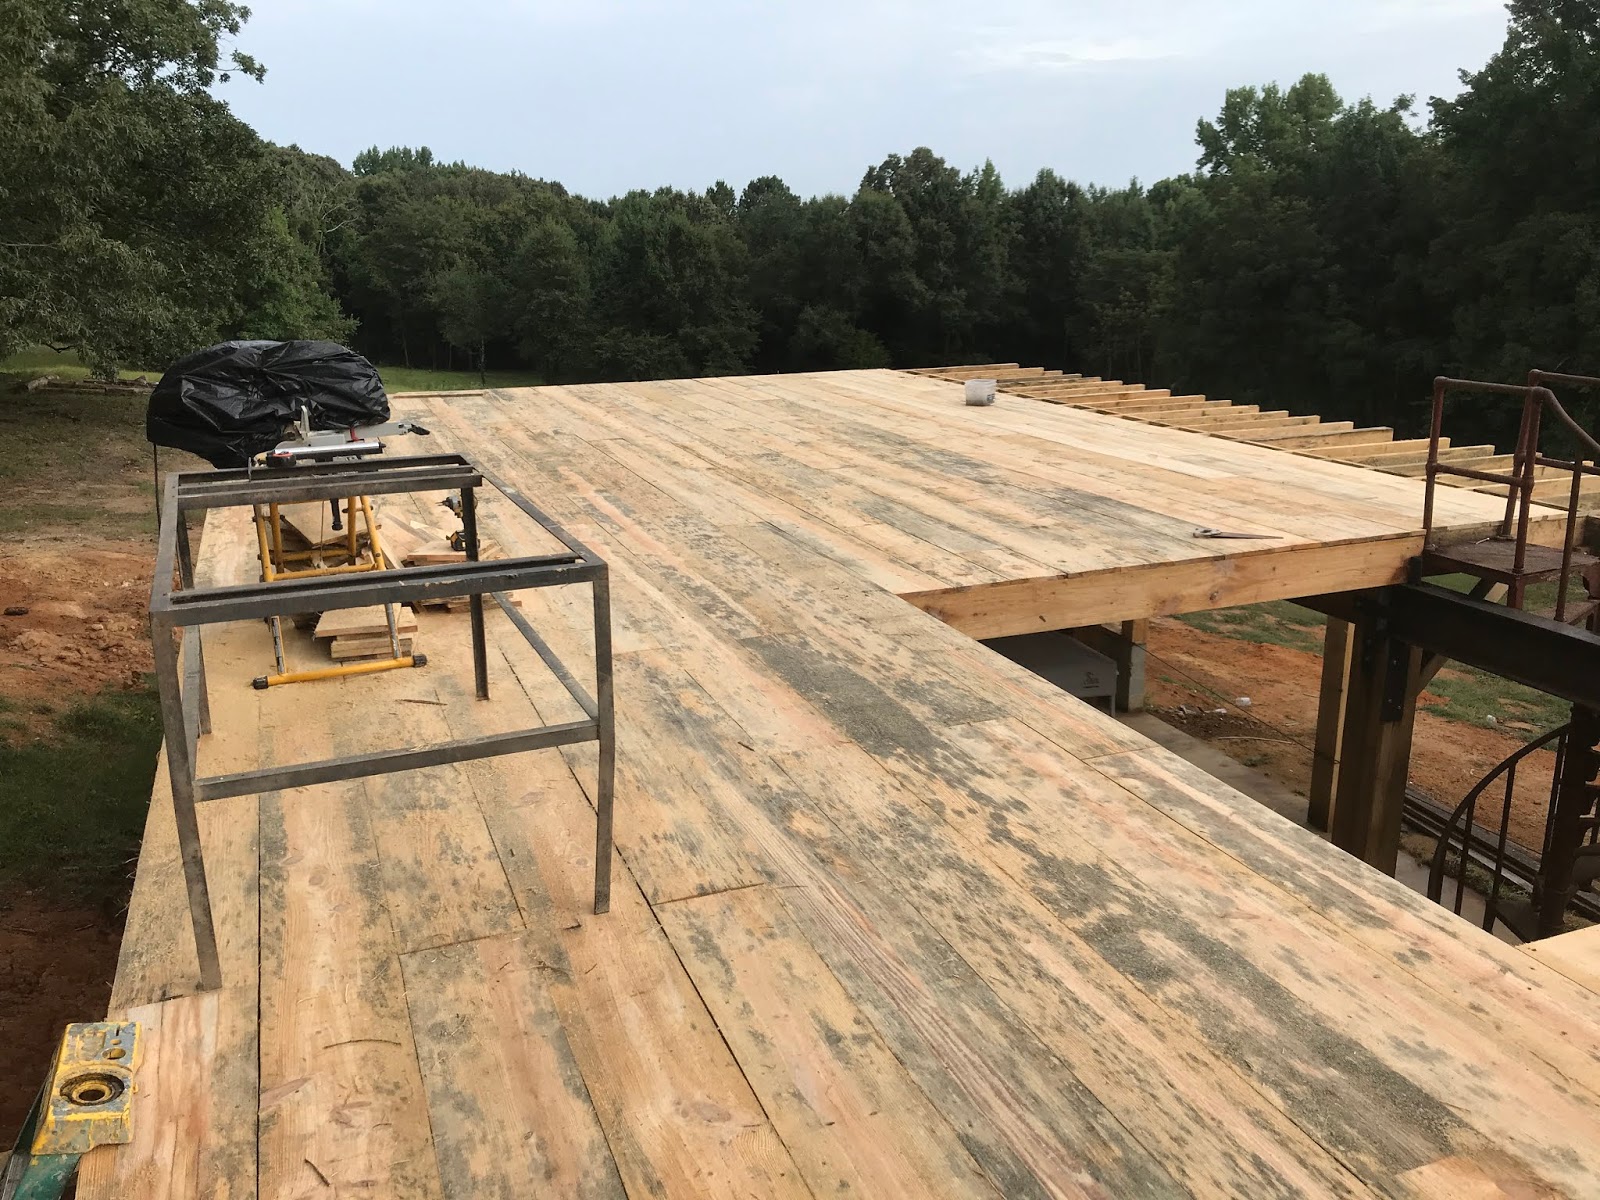

Deck complete, on to the roof. These trusses were built in 4 pieces, which I could set on the deck and assemble by hand. At this point I couldn't think of any means to lean these into vertical by myself. They are not structurally strong at their joints until they are perfectly vertical, and they are...heavy.

Mudpies.

With Alexe and two friends, we managed to get the first truss into position without flipping it off the end of the barn. 27 ft at the peak.

The second truss quickly followed, and with purlins installed and a couple steel diagonals, they locked in position.
Purlins are 2"x6" pine. When ordering the roof trusses I made the mistake of asking for brackets to hold a 2" purlin, and didn't specify I meant a true 2". So they arrived with brackets set up for dimensional lumber, 1.5", and I found myself notching every purlin end to fit.

I would assemble a truss, notch all my purlins, make sure there were cold beverages on hand, and call the crew to come assist for 3 minutes of heaving and 20 minutes of holding in place while I installed enough purlins to fix the truss in place.

Rinse and repeat.


Then the roof! Galvalume, screwed on, with a custom bent piece for the pitch break.

I was a little nervous about doing this on my own, so I invested in some climbing safety gear before climbing to the tippy-top.

Slow and steady. Particular patience when the wind picked up...

At this point we went north for a family wedding and other visits. Leaving deck exposed for 2 weeks was not my favorite.

So as soon as we got back the rest of the roof went on lickety-split.

Skylights, because.

Impatient to move in.
The two weeks up north let me look at all the cupolas on the New England hay barns, and I came back and added my own. Made from cypress.


A little premature, but the hay was in, and the loft was mostly in the dry.

My girl. In our very own hay loft.

Who may have asked if the barn needed to be this big if this was how much hay would be stored in the "hay loft".

Backfilling the hill-facing wall with gravel over a drain pipe and rubberized moisture membrane. None of this really worked to keep the interior wall dry. Gutters and landscaping are improving on this now.

Siding! 1" thick cedar, cut in Philadelphia, Mississippi.

Slow and steady, screwed into place. Note the gutters. Alexe was not pleased to see gutters on the barn. Apparently she has wanted these on the house in the past and I have scoffed.

Siding, and the frame for the end walls upstairs.

The cedar is beautiful, but was very hard to find Mississippi cedar, and it was going to be a question if what I had bought would be enough. (I bought every stick that was available.) A few decisions were made to conserve on siding, like the number and size of the windows. All the glass came from storefronts on Main Street that I have updated with 1" thick insulated glass.


Another impatient animal wanting to move in.

A picture of me and Caspian! Working alone is not conducive to having pictures that include you.


Halloween.

A little premature for glamour shots, but she's so pretty!


I put lots of doors in. Large front and rear on the ground floor, and a pair that open in each direction from upstairs.

Along with high windows to provide light in the stalls, the back two stalls have shuttered windows that were inspired by the barn at the Tunbridge Fair in Vermont, so the animals can stick their heads out and get some fresh air.
Light fixtures from the same factory in Memphis that the spiral stairs came from. Wired with LED lights, and powered by a battery bank that one day will connect to a solar array.

All my favorite things going into the barn. This cast iron and porcelain water fountain, and a daughter who insisted she get the first drink.

Starting on the shed. My bulldozer man has been mia, so the little tractor was stretched again to move a large amounts of dirt to bring this hillside up to level with the barn.
Those large doors on the front, (matching set on the back,) slide open. After pricing the hardware for doors like this, I fabricated a rail out of angle red iron and made the rolling brackets for the doors.

The verticals for the shed are the only pressure treated and/or dimension lumber in the barn. Each is bolted to a large slab foundation stone.


Everything on this barn is overbuilt. 16" on center for a shed roof might have been overkill, but I wanted to be able to walk on it without worrying, and toss bales of hay to slide off the edge without denting/bowing in the coming years.

Exit leading to the shed roof, for easy hay delivery, and access to the future solar array.


Side door into the barn. The rest of the open spaces to be filled in with oak 1" x 12", with dutch doors into the stalls.


Starting on the 6 stalls. Oak, going high for the goats.

So rare to get a shot of Caspian wearing his glasses!

Sarah. Raised from a bottle, she's quite self-assured.

Left hand stalls have the piping in the floors to allow for radiant heat in the future. Right hand side stalls exit to the fields, and have automated waterers for the cows.

Platform on the left side, with stairs to some down the side. This access point is specifically to be able to unload hay and grain directly into the loft form the back of the truck.

New Year's Eve Crappie Drop party.


Annalese's birthday troop.

For the first time, when our various ladies have babies on the coldest, wettest days of the year, as they prefer to do, we can put them in a warm, dry place where they can raise their babies in peace and not compete for their meals! For the first time I feel like I'm doing right by my animals.


Tinkering, hanging the final doors, building grain bins and trap doors, and hanging fun things like a climbing rope.
Caspian in his little red shorts on January 8th. Mississippi winters are unpredictable.

And a basketball hoop!

Which gets almost daily use. (Rolling grain bin in the background, with a trap door and grain shute for filling from upstairs.) Chain hoist on the left with a trolley mounted to the I beam.


Annaliese hanging out with me, i.e. reading in the sun until she falls asleep.

Kagan&Alexe incarnate.

And the barn is now fully integrated into our lives. Play, farm chores, science experiments, (this is Annaliese dropping eggs in boxes on Sunday...)

Check.
1 comment:
Purlins.
Post a Comment